
Last revision September 22, 2008
This page shows how to connect to file shares on the School of Earth Sciences file server, sesfs.stanford.edu, from a Windows PC on which you have logged in with a Stanford Windows domain account (SUNet ID).
If you login to your PC with a local computer account, you must follow the instructions for PC local computer account connection to sesfs.
General requirements for connecting to this server, including how to tell what type of account login you are using, are found on the Windows connections to sesfs page.
If you need help making the connection to sesfs.stanford.edu, put in a request on the HelpSU web site.
You need to know the name of the share you want to use. You can repeat this procedure to connect to multiple shares at once.
All standard methods for connecting to a Windows file server will work for sesfs.stanford.edu. The recommended method, shown below, is to map a network drive. The file share is assigned a drive letter on Windows and is available throughout the life of your login session.
The screenshots were made on Windows XP, but the process is similar for later versions of Windows.
Right-click on the My Computer icon on the desktop to reveal this contextual menu:
If you don't have the My Computer icon on your desktop, you can also open the Start menu and right-click on the My Computer item there.
Select the Map Network Drive... item from the contextual menu. In the Map Network Drive window that opens, you must select a letter from the drop-down Drive: menu. You must type in the server and share specification in the Folder: field in this format:
\\sesfs.stanford.edu\sharename
substituting the name of the share you want to access for sharename. The Browse... button is not useful - none of the shares on sesfs.stanford.edu is visible when you browse the network.
In the example screenshot below, I have selected the drive letter H: and the home share farrell. When connecting from the Stanford campus network, you can abbreviate the server name by omitting the .stanford.edu domain part.
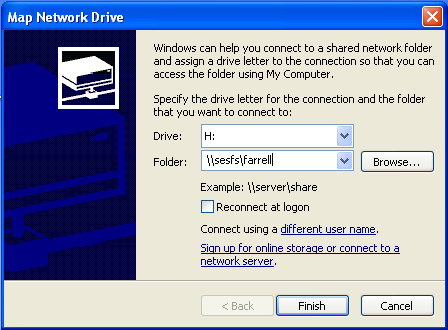
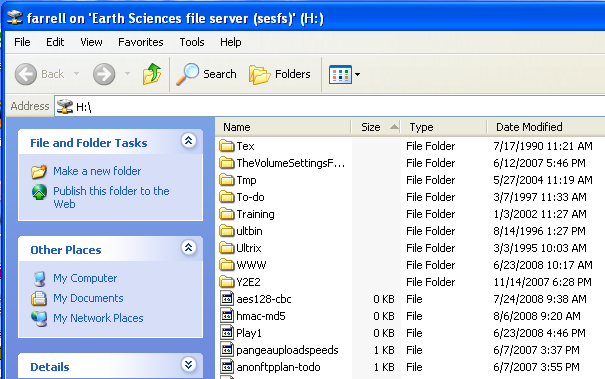
Click on the Finish button on the bottom of the window to connect to the share you have specified. After only a few seconds, a Windows Explorer window should open to show the contents of the share, as shown in this example screenshot:
If a Windows Explorer window does not open to show the share contents, and instead you are prompted to enter a username and password, this likely means that your SUNet ID does not have permission to access this share. If you believe you should have access to this share, contact the system managers.
You can work with the files on this file share as if they were locally connected to your PC. Because the file share is mapped to a drive letter, if you close the Windows Explorer window, you do not lose access. Just open My Computer and click on the drive letter you selected to see the share contents again.
When you logoff or shutdown your PC, you will be automatically disconnected from the file server. You can also disconnect a file share while you stay logged in to the PC. First make sure that no program is using any file on this share, and close any Windows Explorer window that is showing its contents. Then right-click again on My Computer, but this time select Disconnect Network Drive... from the contextual menu. That will open a window showing all your connected network drives, as in this example screenshot:
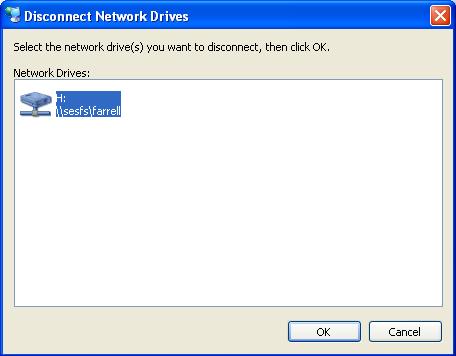
Select the drive you wish to disconnect, and click on the OK button.